File Management API Documentation
Summary
This document provides instructions concerning the usage of Capmo file management APIs.
If you have further questions, kindly reach out to our team: [email protected].
File Upload Flow

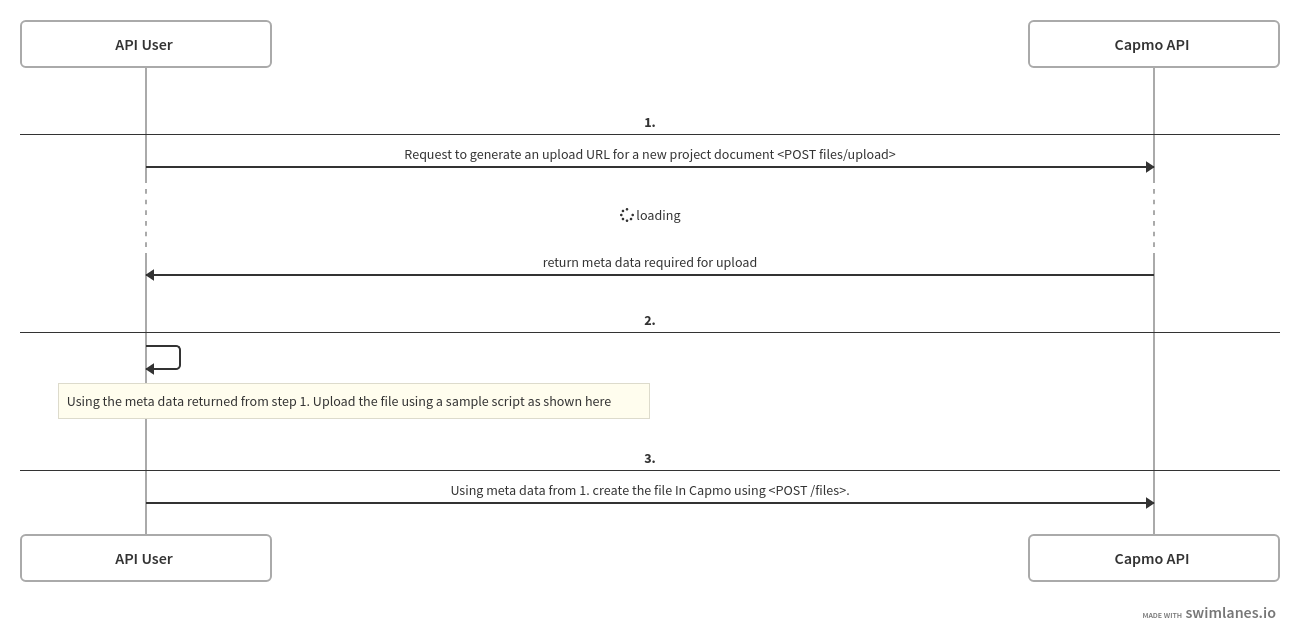
1. Generate Upload URL
This step is required to get a temporary url for uploading a specific file. If you were to upload multiple files, you'd need to call this to generate an upload url for each file to be uploaded.
For each file, you need to specify its mime_type. After submission, the response contains appropriate meta data necessary to upload the file in question.
The endpoint and contract for this can be found here.
2. Upload File
After generating an upload URL, extract the following from the meta data in the response:
- fields
- upload_url
- data_path
Logic For File Upload
- FormData Initialisation: Create a new FormData object to store form key-value pairs and the file.
- File Handling: Read the content of the file you want to upload.
- Appending Form Fields: Loop through all
fieldsfrom above and append them to the FormData object. - Appending File: Append the file content read during file handling to the the FormData object.
- Making POST Request: Make a POST request to the
upload_urlwith the FormData. Make sure to include relevant headers likecontent-type. - Handle responses and errors: Check the response for success or failure.
Example (JavaScript)
const uploadFile = async (fields) => {
  // Step 1. FormData Initialisation.
  const formData = new FormData();
  const fileName = 'testFile';
  const filePath = `<Directory>/${fileName}.pdf`;

  try {
    // Step 2. File Handling.
    const fileContent = await readFileFromExpectedDirectory(filePath);

    // Step 3. Append all fields from the `fields` object to the FormData object
    Object.entries(fields).forEach(([key, value]) => {
      formData.append(key, value);
    });

    // Step 4. Append File.
    formData.append('file', fileContent, { filename: fileName });

    // Step 5. Make a POST request to the presigned URL with the FormData
    const response = await axios.post(upload_url, formData, {
      headers: {
        ...formData.getHeaders(),
      },
    });

    // Step 6. Handle Response.
    console.log('Asset uploaded successfully:', response.data);
  } catch (error) {
    // Step 6. Handle Error.
    console.error('Error uploading asset:', error);
  }
};
3. Create File In Capmo
After the previous step, i.e. uploading the file, It is stored in a temporary storage. We need to persist it to Capmo: Make request to this endpoint for persisting the file to Capmo.
Other File Management APIs
The following file management endpoints are also available In addition to file uploads: